Adding a Target in HYCU PROTEGE for VMware
This article describes how to connect HYCU Protege for VMware v4.9.0 with Impossible Cloud Storage.
You'll need to create a bucket in your Impossible Cloud Storage console.
You can create a bucket with versioning and Object Lock enabled and a retention you'd like to set (for instance 10 days) to get a higher level of protection against malware or a bad actor.
.png?alt=media)
Here is a link to the Impossible Cloud Storage documentation, which includes detailed instructions and screenshots for creating a bucket with versioning and Object Lock.
First, consult the HYCU documentation and deploy the appliance you will use into your VMware environment.
Step 3: Add a source
Open the settings cogwheel and click "Sources". Add your source of data to back up.

Targets are locations where protected data is stored. In addition to using targets to store protected data, HYCU also allows you to define a snapshot as a location for storing your data.
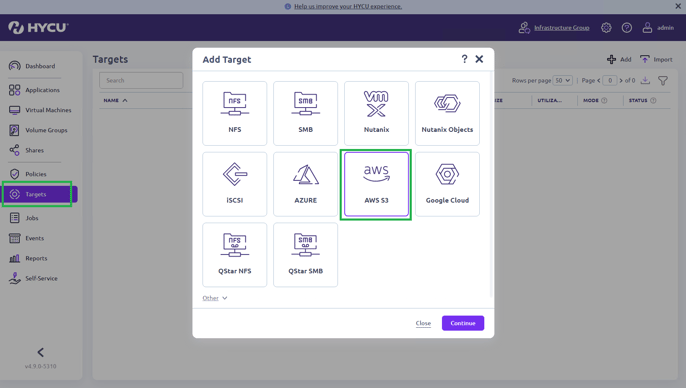
Open the "Targets" tab on the left, then click "Add" on the top right. Choose "AWS S3" and click "Continue".


Please consult the HYCU documentation for more information.
Step 5: Enter Target-Specific information
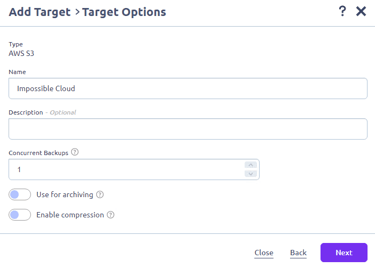
Fill the name and set the target's properties. Consult with the HYCU documentation if needed.

Done.
You have added the Impossible Cloud Storage bucket as a target location. You can now start backing up your data to Impossible Cloud.

