
Prerequisites
- Required access and permission to an Impossible Cloud storage account.
- Required access and permission to manage an Acronis Customer Backup Plan and Locations.
Step-by-Step Instructions
1. Create an S3 Bucket on Impossible Cloud
To prepare the backup location in Acronis Cyber Protect Cloud, you'll need to create a bucket from your Impossible Cloud Storage console. Access your Impossible Cloud Storage Account and create a bucket in your chosen regions. Follow the steps on this article, which includes detailed instructions and screenshots for creating a bucket with versioning and Object Lock.
Enabling bucket versioning and Object Lock is optional. When you want to use the immutability feature in Acronis, you'll need to a bucket with versioning and Object Lock enabled and retention disabled.
2. Create an Access Key and Secret Key
After creating the bucket, go to the IAM > Keys menu in the storage console. Click Add key and retrieve your access and secret key for the storage account.
The steps above allow you to generate a root-level access key. For a more granular access control to your buckets, follow the steps in this knowledge base article.
3. Add a New Backup Location in Acronis Backup Console
- Login to your Acronis Cyber Service Provider console
- Navigate to your Acronis customer tenant and click Open Service.
- Open the Backup Storage > Backup menu in the Acronis Customer Tenant
- Click on Add location, select Public Cloud, choose S3 Compatible in the dropdown and then click Connect.
Please note that the Public Cloud option is only available if you have enabled "Direct Backup to Public Cloud" for your Acronis customer tenant.
- Specify your appropriate Management agent which is currently online.
- Enter the corresponding endpoint URL where your bucket is located.
- Enter Credentials: Enter the Access Key from step 2 into the Access key ID field and the Secret Key into the Access key secret field.
- Connect: Click "Connect" to save the backup location settings.
- On the next screen, give the new backup location a meaningful Location name.
- Open the Buckets drop-down and select an existing bucket (e.g. the bucket from step 1) to be registered as the backup location.
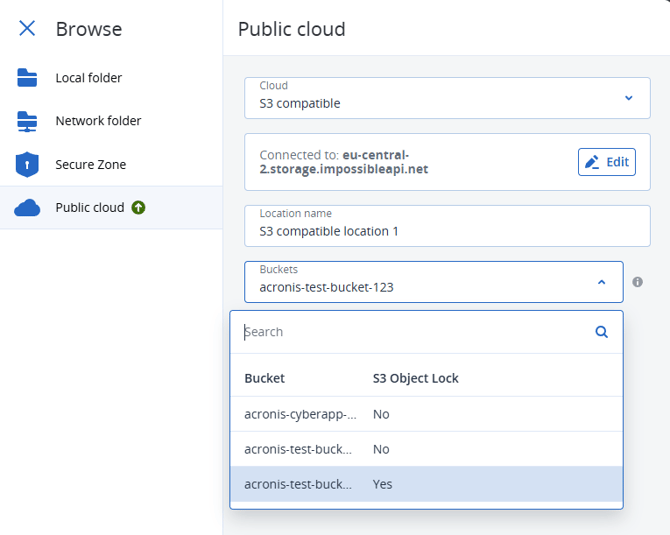
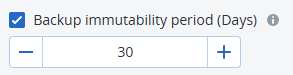
- (optional) If you're bucket' Object Lock is enabled, Acronis will prompt you to set the backup immutability period in days.
Important Note on Acronis Immutable Backups
Immutability Period and Cleanup rules are required if you are doing an Immutable Backup using the Acronis S3 Compatible Connector.
Failure to do these steps in an immutable backup may cause in continously increasing storage usage.
Due to this limitation, please ensure the following:
-
A custom bucket clean up task is configured. See the following article that for more details and resolution steps: https://kb.impossiblecloud.com/en/acronis-cleanup-immutable
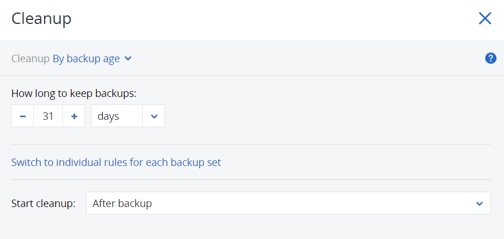
- The Acronis cleanup rules of your protection plan exceed the backup immutability period you set in last item of step 3 of this article. Otherwise, a backup agent will remove the backup from its database but will be unable to delete it from Impossible Cloud Storage due to the immutability protection.
For example, if the immutability period is set to 30 days, the Cleanup setting of your protection plan for that backup location should be at least 30 days.
Result
Once the public cloud location is created, it can be used as a destination in Protection Plans and Replication Plans. For detailed instructions on adding access to a public cloud connection, refer to the Acronis guide.
For further assistance, please refer to the linked guides or contact support.